
PAX terminal: change the date and time
On a PAX you scroll to the right menu, then type the new date and time over the old ones. It does not ask for a password. Have the current Eastern time ready, on a 24-hour clock.
From the Input Amount screen (the one that says Credit and Sale), press the blue Menu button to open the Main Menu.

Use the down arrow to highlight System Settings, then press the green Enter button.
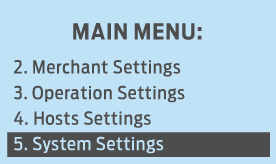
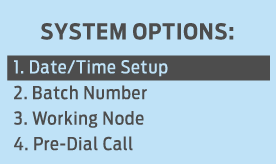
On the System Options screen, use the down arrow to highlight Date/Time Setup, then press Enter.
The screen shows the date and time the terminal has right now. Under each one is the format it expects.
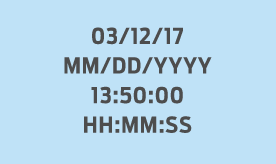
The line under the current date is where the new date goes, as MM/DD/YYYY. For November 2, 2026, that is
11/02/2026.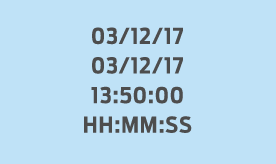
The line under the current time is where the new time goes, as HH:MM:SS on a 24-hour clock. For 9:30 AM, that is
09:30:00. Press Enter to save.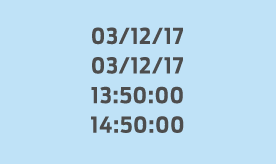
Open Date/Time Setup again to confirm it now shows the right time. If it does not, repeat the steps, and call or text us at 1-855-297-6722 if it keeps reverting.
Not a PAX? Head back to all four terminals.